Getting Started with Arduino

The Ramblings of an old man
In my years as a young boy, it came a time when I had to call myself to action. To stop procrastinating and just start! Be that as it may, I’ve still put off writing this post for quite a while now.
You wanna know why?...
I'll take your silence as a "YES!" (a very enthusiastic one!)
This title is actually harder to write about than it looks… 😅
TL;DR:
Arduino is awesome! You should fall for its allure!
Whetting your appetite
This is the first in a series of Arduino tutorials, where I take you from zero to perhaps around 50 percent (I’m really trying being reasonably optimistic) of what you could know about Arduino and all that you could do with the powers bestowed upon you by this cheap, open-source hardware prototyping platform. You may hear (or in this case read) that and think, “Whoa! Whoa! Whoa! Slow down, dude from the internet, who I don’t know, who apparently wants to share what they know about ‘this stuff’ with me.” Well, it may be a little too early to start dropping jargon on you. My hope, though, is to walk you through to a working understanding of what all these appalling words mean.
While beginning the writing of this series, I’m operating on certain assumptions:
- I assume no technical expertise whatsoever in whoever happens to stumble upon this series and wants to learn from it.
- I assume that you have a burning interest in learning about technology and its inner workings, otherwise, why else would you be here?
- I assume that you have access to the internet, and the Google universe (or other search engine of your choice). I may overlook explaining some jargon from time to time, in which I encourage you to use these other resources at your disposal.
- I assume that you have gained access to this here, my archive of knowledge, out of your own will. Scream, or click here, if you’re here against your will.
- And the biggest assumption of all is that you’re a fellow life form, and not a robot from the future, trying to track my development of killer robots of the future! But if that’s the case, bring it on!
What is Arduino?
Well, that’s a very good question, fellow life form on some other corner of the internet. Have you ever thought of making a killer robot, a drone, a door that screams as a security measure, or just some other mundane thing like replacing the light bulb in your room with cool lights that change colour based on the music playing in said room? You may be thinking, “Well, that last one is oddly specific...”. By the end of this series, I’ll show you my implementation of a cool (not low temperature) lighting system. Well Arduino is the easiest way to begin on a trajectory that fulfills all these visions (again, quite optimistic since it’s all possible).
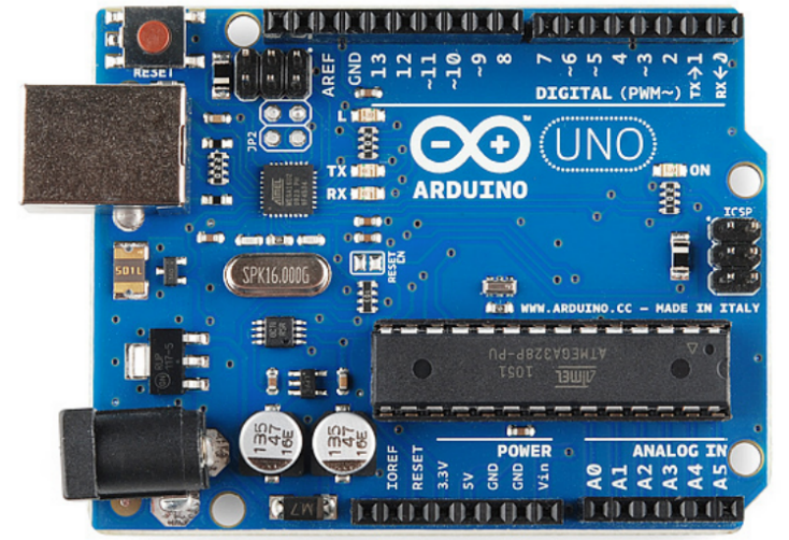
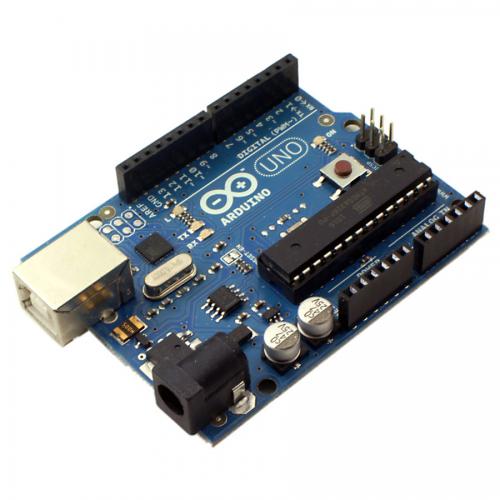
Below is an Arduino board, more specifically, an Arduino Uno:

What you see is a Printed Circuit Board, or PCB, which is designed for simplicity in development of hardware prototypes.
The Arduino board is usually used alongside the Arduino IDE (Integrated Development Environment), which is a computer software used in writing a program that tells the Arduino board what to do.
The Arduino board is connected to the computer using a USB cable, through which the program is uploaded (transferred) to the board.
Why Arduino?
- It is inexpensive
- The Arduino IDE is cross-platform (can be used on any operating system)
- The Arduino IDE is easy to use for beginners
- Open source and extensible software and hardware (experienced programmers can expand the use of Arduino by creating extensions to the Arduino code without restriction - don’t worry padawan, you’ll get there)
What would it take?
Do you aspire to pluck the tasty fruits off this Arduino tree, from the garden of open source hardware. I’ll let you in on a little secret. These are the very basic things you would require, your fruit-picking equipment if you will:
- First, and most importantly, the zeal and enthusiasm to learn.
- Second, you’d require the Arduino IDE. You’ll need to download and install the software, which is open source (that means it’s completely free). You can easily acquire this by clicking here
- Third, you’ll require a physical Arduino board. Just plug it into your computer and we’ll get started!
- If you don’t have an Arduino lying around, don’t worry you won’t entirely miss out (though honestly I would advise you to get one). You can just as easily access some of the resources required online, and for free! Which you can access via TinkerCad
- Also you’ll need to hold on to your hats, and buckle up for fun. There are few things in this world that are as satisfying as seeing as your code is transformed into observable changes in the real world.
In the next tutorial of the series, we’ll be looking at setting up the Arduino IDE, and we can finally call ourselves Embedded Engineers! (Sounds awesome, right?) Well, we’re just getting started!
We’ll end this tutorial with a fun fact:
Did you know?
Did you know that surveys indicate that 78% of all businesses which incorporate the use of software in their activities, are operating on open source software? Click here to learn more.Compliment? Criticism? Question?
Feel free to drop me an email, right here!